Mood Light
“Three colours. One button. You set the mood.”
Your Arduino, button, and three LEDs — red, green, and blue.
Three LEDs in different colours, three 220 ohm resistors, a push button, jumper wires, and a breadboard.
Three LEDs that cycle through different lighting moods each time you press the button — red, green, blue, all three, and off.
Watch the full lesson walkthrough.
Copy this. Paste it into your AI. Hit Enter.
Three LEDs and one button.
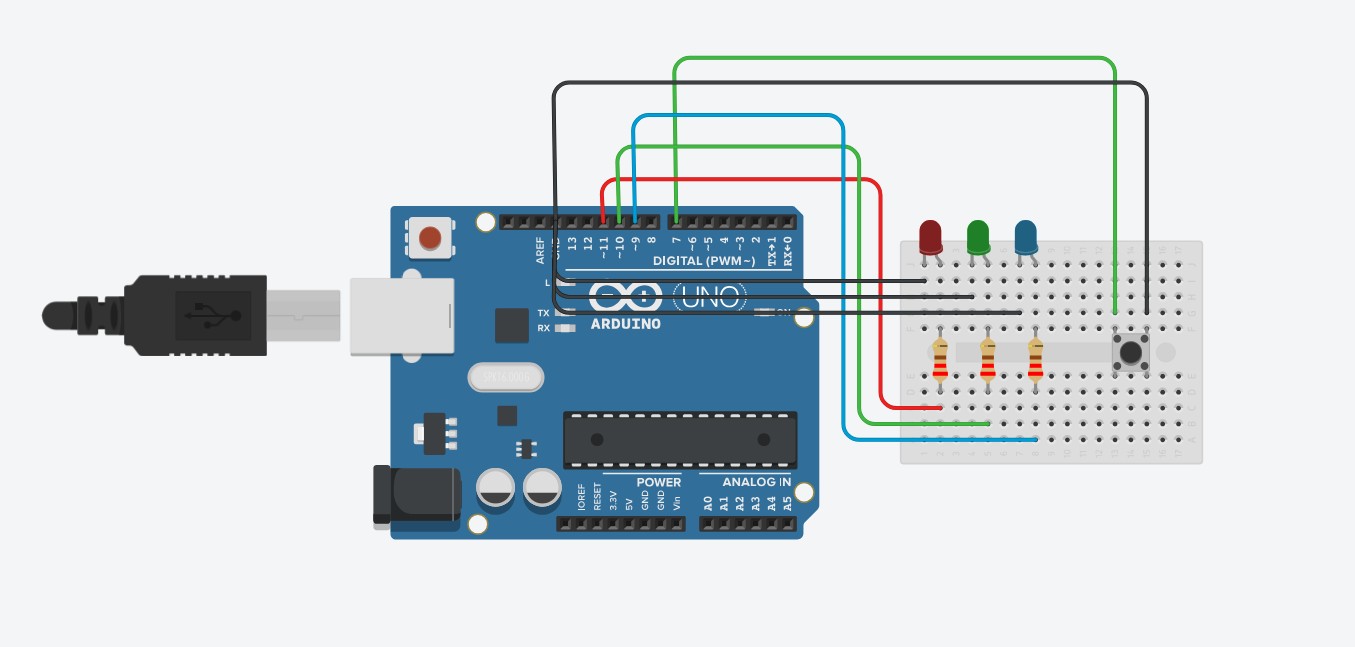
Your wiring should look like this — red to pin 11, green to pin 10, blue to pin 9, each with its own resistor to GND. Button on pin 7.
Check these first:
Feel the difference debouncing makes.
Find the delay value in the debounce section — it’ll be something like 50. That’s 50 milliseconds. Change it to 200. Restart the simulation and press the button fast. See how it doesn’t jump states? That’s debouncing doing its job.
Change it back to 50 and try again. Now try 10. You can feel the difference. One number. Changes the whole feel of the button.
Want to go further?
Now you’ve got an automatic cycling mode. That’s an interrupt in everything but name. Real product behaviour from one prompt.